| “This site contains affiliate links for which OEMDTC may be compensated” |
SUBJECT:
ALTERNATOR PULLEY AND TENSIONER REPLACEMENT
This bulletin provides information related to the ECM software upgrade and alternator pulley replacement for some 2013MY Sorento vehicles, produced from February 16, 2012 to September 13, 2012, to improve idle RPM stability (750 to 680) while at a stop with A/C ON. It is important to note that the 2.4L GDI engine has a certain level of harmonic vibration while at low idle RPM which is a normal characteristic of this engine design. For confirmation that the latest reflash has been performed to a vehicle you are working on, verify ROM ID using the tables in this TSB.
CAUTION
DO NOT attempt to jack the engine up by the oil pan as this may result in damage to the oil pan. In addition, the clearance between the oil pan and oil screen pick- up is minimal and a collapsed pan can restrict oil flow into the pump assembly.
Any claims associated with this type of damage are not covered under warranty and may result in a chargeback being issued to the dealer for improper repair.
Service Procedure:
- Disconnect and isolate the negative terminal from the battery.
*NOTICE
Record the customer’s radio presets before starting procedure.
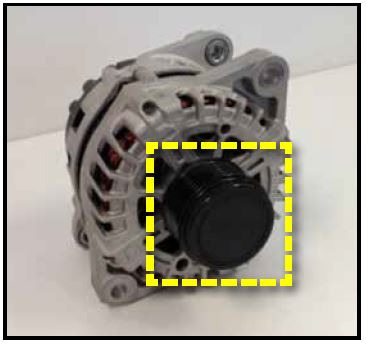
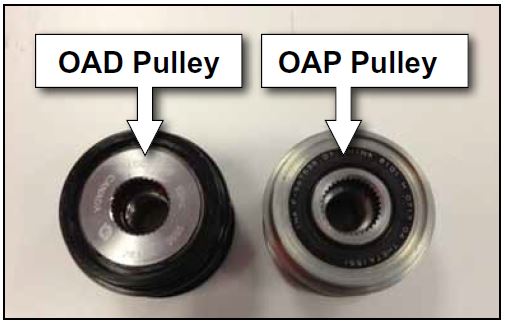
- Inspect the alternator pulley to confirm the specific type of pulley installed on the vehicle. If the vehicle is equipped with the original Alternator dampening pulley (oAd) (see identification chart below), perform the procedure outlined in this TSB.
| Pulley Identification Chart | |
|---|---|
| Pulley Type | Body Color |
| OAD | Black |
| OAP | Silver |
*NOTICE
If the vehicle is equipped with the Overrunning Alternator Pulley (OAP), proceed with re-flash procedure only.
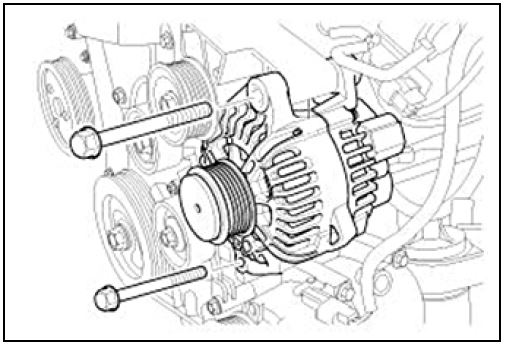
- Remove the alternator (A) from the vehicle.
Refer to the following section on KGIS for removal information:
SORENTO(XM) > 2013 > G 2.4 GDI >Engine Electrical System > Charging System > Alternator > Repair Procedures
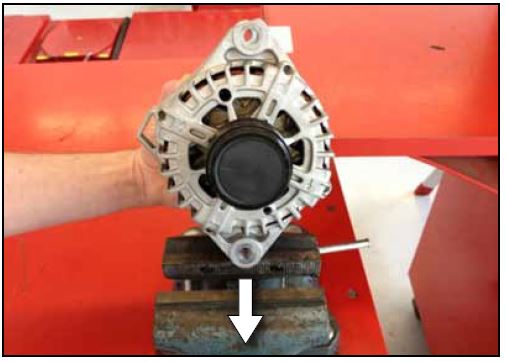
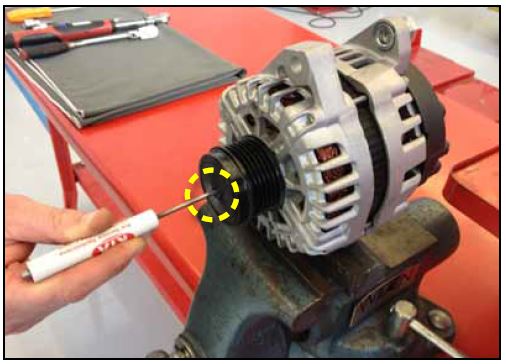
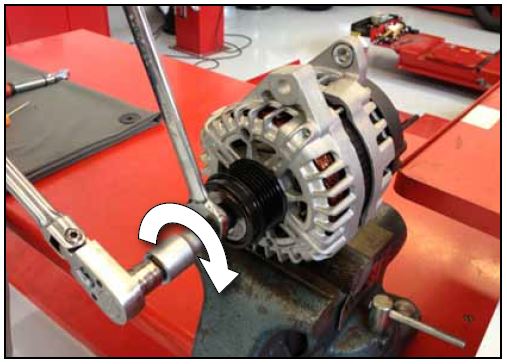
- Secure the alternator in a shop vise as shown in the image.
CAUTION
Avoid excessively tightening the vise around the alternator mounting flange or use vise jaw pads to protect the surface integrity of the alternator mounting flange.
- Puncture the center of the alternator pulley dust cover with a pocket screwdriver or pick tool.
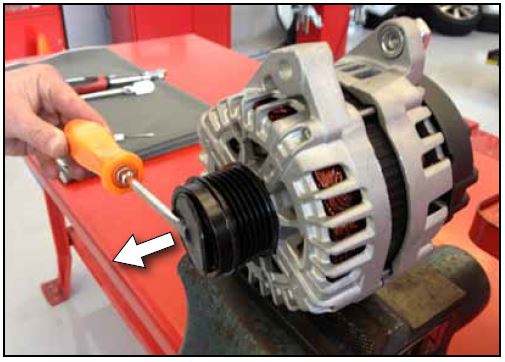
- Using a flat bladed screwdriver, remove the dust cover from the pulley.
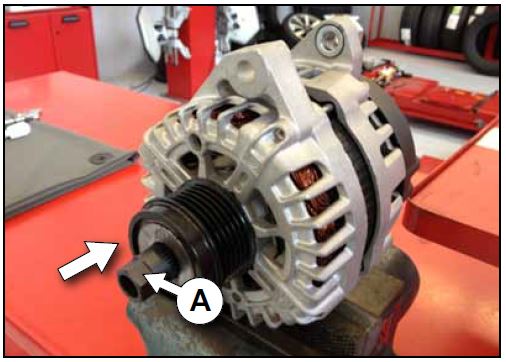
- Use the Alternator pulley removal /Installer Kit (P/N 09373-27000), to remove the OAD alternator pulley by inserting the removal tool (A) into the pulley splines, as shown.
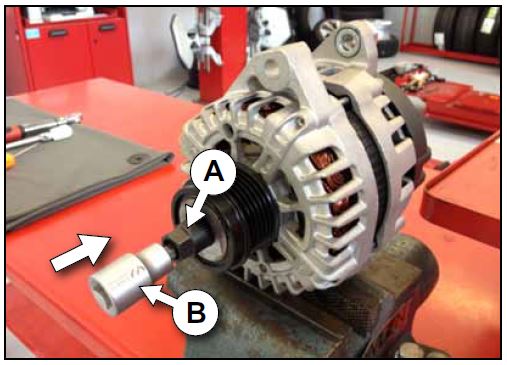
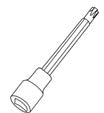
- Insert the T-50 Torx socket (B) through the pulley removal tool (A) and into the alternator shaft.
CAUTION
Confirm the socket is fully seated A to avoid damage to the alternator shaft.
- Use a wrench to hold the pulley removal/ installation tool and rotate the Torx socket clockwise to loosen the pulley.
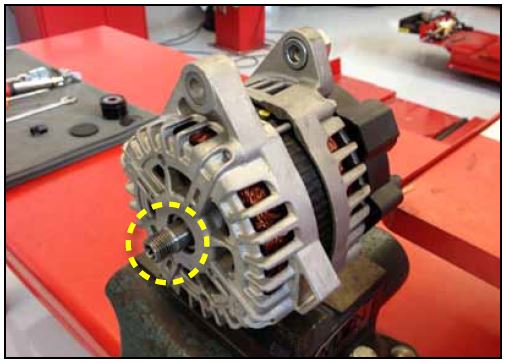
- Remove the pulley from the alternator.
NOTE: Make sure the shaft is clean and free of debris before proceeding.
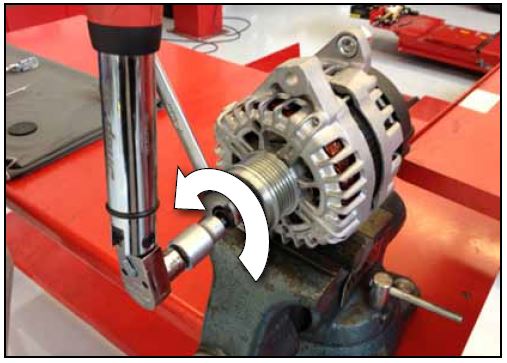
- Install new OAP pulley onto the alternator shaft by hand. using a wrench, pulley removal/installation tool and Torx socket, secure the OAP pulley to the shaft by turning the socket counter-clockwise.
Torque pulley to the specification below:
Tightening torque: 50 lb-ft (67Nm)
- Make sure the alternator pulley spins freely before proceeding.
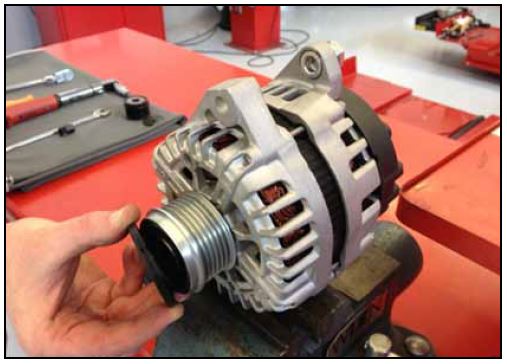
- Install new dust cover onto pulley.
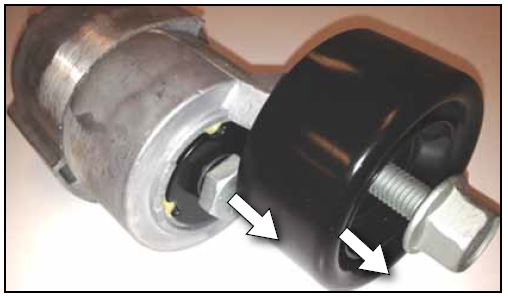
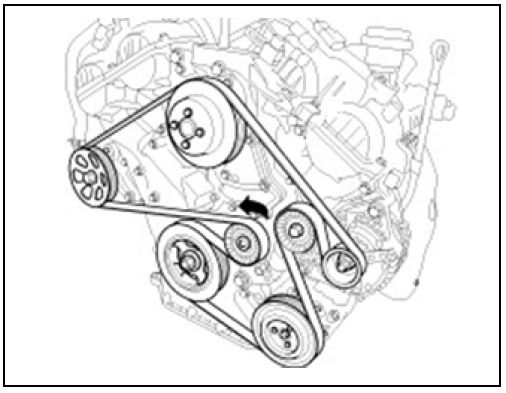
- Remove the drive belt tensioner by removing the pulley bolt and mounting bolt.
Note: The pulley bolt is left-hand thread.
- Install new parts by reversing the removal process.
Torque the components to the specification below:
- Tensioner Mounting Bolt (M12) 39.7~47 lb-ft (53.9~63.7 Nm)
- Tensioner Pulley Bolt (M12) 39.7~47 lb-ft (53.9~63.7 Nm)
- Re-install the alternator by reversing the removal procedure.
Tightening torque:
Alternator M8 mounting bolt 19.5~24.6 lb-ft (26.5~33.3 Nm)
- Re-install the serpentine belt.
*NOTICE
Reprogram the customer’s radio presets as recorded earlier.
CAUTION
Before attempting an ECM upgrade on any Kia model, make sure to first determine whether the particular model is equipped with an immobilizer security system. Failure to follow proper procedures may cause the PCM to become inoperative after the upgrade and any claims associated with this repair may be subject to chargeback.
ECM Upgrade Procedure:
To correct this condition, the ECM should be reprogrammed using the GDS download as described in this bulletin.
| UPGRADE EVENT NAME |
|---|
| 194. XM 2.4 GDI IDLE RPM STABILITY IMPROVEMENT (VER. 2) |
- A fully charged battery is necessary before ECM upgrade can take place. It is recommended that the Midtronics GR8-1299 system be used in ECM mode during charging. DO NOT connect any other battery charger to the vehicle during ECM upgrade.
- All ECM upgrades must be done with the ignition key in the ‘ON’ position.
- Be careful not to disconnect any cables connected to the vehicle or GDS during the ECM upgrade procedure.
- DO NOT start the engine during ECM upgrade.
- DO NOT turn the ignition key ‘OFF’ or interrupt the power supply during ECM upgrade.
- When the ECM upgrade is completed, turn the ignition ‘OFF’ and wait 20 seconds before starting the engine.
- ONLY use approved ECM upgrade software designated for the correct model, year.
ROM ID Information Table: Upgrade event #194:
| MODEL | MY | IMMO | ECM P/N | ROM ID | |
|---|---|---|---|---|---|
| A/T | PREVIOUS | NEW | |||
| XM 2.4 GDI | 2013
| No (-) | 39113-2G761 (2WD) 39114-2G761 (4WD) | XDC4ME0A XDC4MEAA XDC4MEAB XDC4MEAC XDC4ME0A XDC4MEAA XDC4MEAB XDC4MEAC | XDC4MEAD |
| Yes(+) | 39113-2G771 (2WD) 39114-2G771 (4WD) | XDC4RE0A XDC4REAA XDC4REAB XDC4REAC XDC4RE0A XDC4REAA XDC4REAB XDC4REAC | XDC4READ | ||
*NOTICE
Do NOT attempt to perform a Manual Mode upgrade unless Auto Mode fails. Always follow the instructions given on the GDS tool in either Auto or Manual mode. See table for Manual Mode passwords.
CAUTION
Before attempting an ECM upgrade on any Kia model, make sure to first determine whether the particular model is equipped with an immobilizer security system. Failure to follow proper procedures may cause the PCM to become inoperative after the upgrade and any claims associated with this repair may be subject to chargeback.
MANUAL MODE ECM UPGRADE PASSWORDS:
Upgrade event #194:
| Menu | Password |
|---|---|
| XMA GDI 2.4 – Immo : 39113/39114-2G761 | 2761 |
| XMA GDI 2.4 + Immo : 39113/39114-2G771 | 2771 |
Affected Vehicle Production Range:
| Model | Production Date Range |
|---|---|
| Sorento (XM) | February 16, 2012 to September 13, 2012 |
REQUIRED PART:
REQUIRED SST:
| Alternator Pulley Removal/Installation Kit (P/N 09373-27000) | |
|---|---|
| Pulley Removal Tool | T-50 Torx Socket |
 |  |
 Loading...
What is J2534?
A single set of programming hardware consists of personal computer(PC), standard interface to a device driver and an interface hardware that connects between PC and a programmable ECU of vehicle.
The main purpose of this regulation is to program ECUs for all vehicles using a single set in the field.”
| Device | Manufacturers | API | DLL | Firmware |
|---|---|---|---|---|
| CarDAQ Plus | Drew Technologies Inc. | 4.04 | 1.9.28 | 1.9.28 |
| ES6510 | Vetronix Corporation | 4.04 | 12.00 | 12.00 |
| Sun PassThru Pro | Snap-on Diagnostics | 4.04 | 02.07u | 02.07u |
| PassThru+ XS | I+ME Actia GmbH | 4.04 | 02.07u | 02.07u |
| OTTOTEST-VCI | OTTO | 4.04 | 1.04 | 1.34 |
| iFlash | Blue Streak | 4.04 | 1.04 | 1.34 |
| PASS THRU PRO II | Snap-on Diagnostics | 4.04 | 1.9.24 | 1.9.24 |
| AEZ Flasher | AE Tools | 4.04 | 1.9.28 | 1.9.28 |
| VSI-2534 | Dearborn Tech | 4.04 | 2.05.26 | 2.05.26 |
| Flasher Pro | Bosch | 4.04 | 1.9.28 | 1.9.28 |
| Flash2 | Cardone | 4.04 | 2.06.28.2 | 2.06.28.2 |
| PX3 | Dearborn Tech | 4.04 | 1.00.09 | 1.00.09 |
| CARDAQ-M | Drew Technologies Inc. | 4.04 | 1.0.106 | 1.0.106 |
| Universal Reprogrammer II | EASE Diagnostics | 4.04 | 1.9.28 | 1.9.28 |
| G-Scan2 | GIT | 4.04 | 3.1 | 9.03 |
* API, DLL and Firmware version may be controlled by the device manufacturer. Contact the manufacturer if you are unable to find the version listed above All devices were tested/verified on all Kia engine management systems.
