| “This site contains affiliate links for which OEMDTC may be compensated” |
SUBJECT:
SORENTO STAINLESS BUMPER PROTECTOR SEPARATING
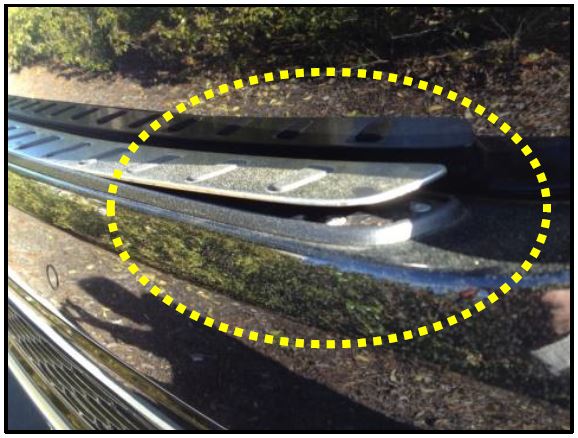
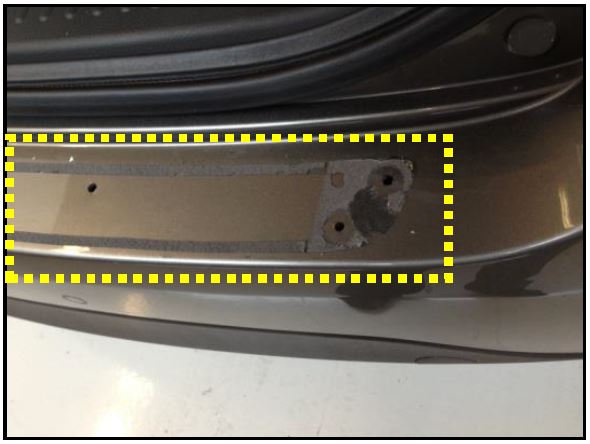
Some 2014MY Sorento vehicles, equipped with a Kia accessory Stainless Rear Bumper Protector, may exhibit a condition where the stainless insert is separating from the protector base, as shown below. To resolve this condition, a revised bumper protector should be installed. Follow the procedure outlined in this TSB to remove the original bumper protector and then follow the instruction sheet enclosed with the revised part to install the new bumper protector.
Sorento Rear Bumper Protector Installation Video
Service Procedure:
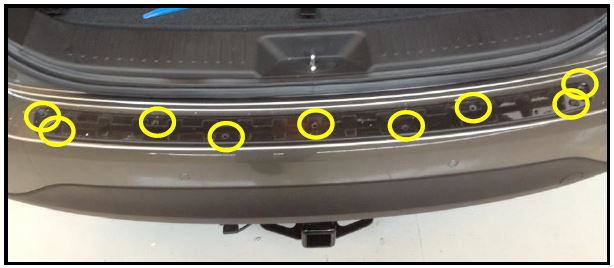
- Remove stainless insert and carefully drill out 9 rivets on bumper protector base.
NOTICE
Be careful when drilling out the rivets NOT to enlarge the rivet holes.
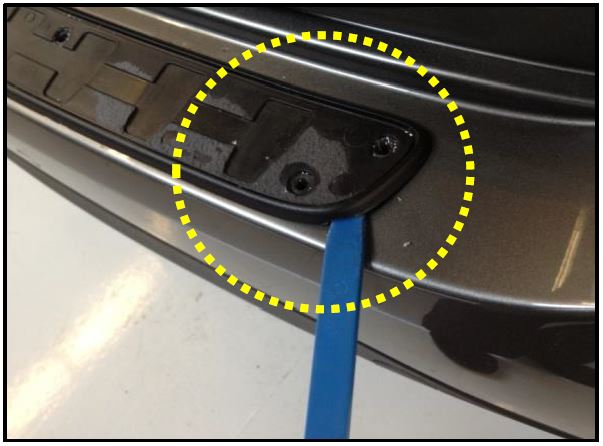
- Use a plastic removal tool to carefully lift the corner of the bumper protector base.
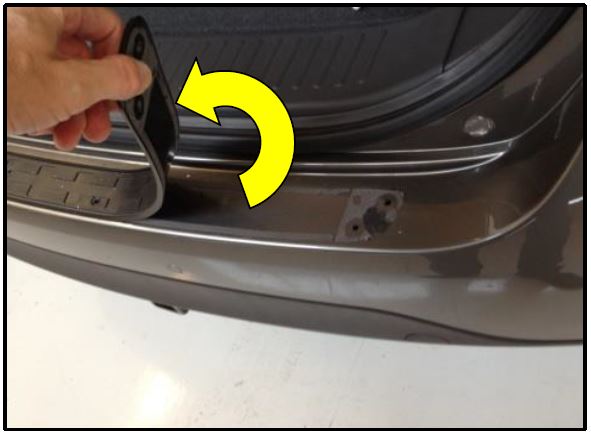
- Remove bumper protector base by pulling upwards.
- Remove all double sided tape from the bumper cover using an appropriate adhesive removal tool and clean the bumper cover prior to installing the revised bumper protector.
- Follow the instructions included with the revised part to perform the installation.
*IMPORTANT INSTALLATIONTIPS
- Scan the QR code or click on the link to view bumper protector installation video (PG. 1).
- The original bumper protector base must be replaced with the revised base to ensure proper adhesion of the stainless insert.
- When applying promoter (step 14 in installation instructions), ensure complete coverage on the raised portions of the base, especially at the ends. Also, allow the promoter to dry for 60 seconds before installing the insert.
- Ensure all three of the rubber pads are fully installed into the bumper protector stainless insert (step 15 in installation instructions).
- Properly align the bumper protector stainless insert to the bumper protector body (step 16 in installation instructions).
- Once the stainless insert is installed (step 17 in installation instructions), ensure FIRM and EVEN pressure is applied around the entire perimeter of the insert using your fingers for a minimum of five (5) minutes (update to installation instructions).
REQUIRED PART:
| Part Name | Part Number |
|---|---|
| BUMPER, PROTECTOR | 2PF31-AC500 |
 Loading...
