SUBJECT:
PANORAMA SUNROOF & SUNSHADE MOTOR REPLACEMENT
This bulletin provides the procedure to replace the panorama sunroof and sunshade motors on some 2012-2013MY Optima (QF) vehicles, produced from August 9, 2011 to August 14, 2013, which may exhibit a loss of the “one-touch” open/close feature of the sunshade and/or panorama roof. This condition may be attributed to the exposure of the ECU in each motor to static electricity, causing a loss of initialization memory. To correct this concern, install the new sunroof and sunshade motors by following the procedure outlined in this bulletin.
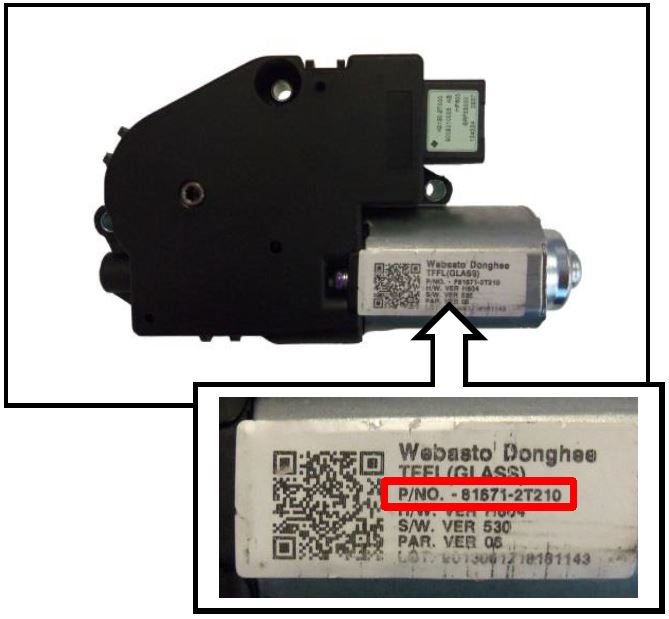
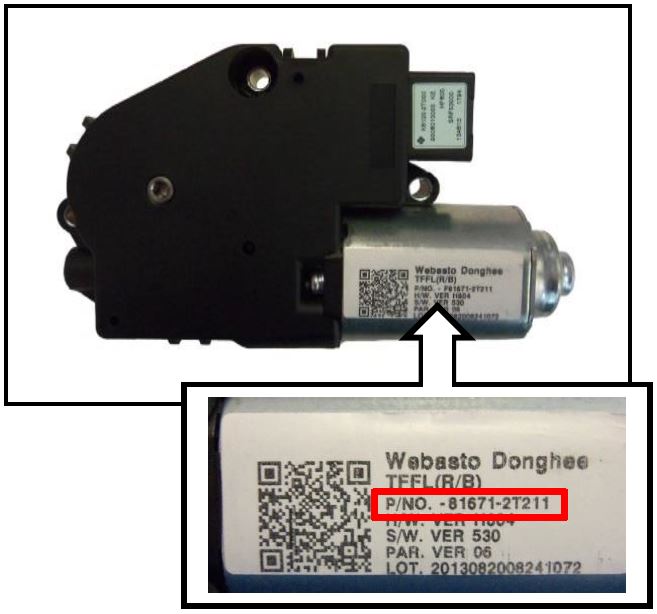
Refer to the table below to differentiate between the sunroof and sunshade motors.
| Sunroof Motor P/N 81671-2T210 | Sunshade Motor P/N 81671-2T211 |
|---|---|
 |  |
*NOTICE
VINs which start with KNA are designated Optima (TF/TF HEV) and built in South Korea. VINs that start with 5XX are designated Optima (QF) and built in the United States. This TSB applies to Optima (QF) only.
*NOTICE
After replacing the panorama sunroof & sunshade motors, perform the panorama sunroof motor initialization.
Service Procedure:
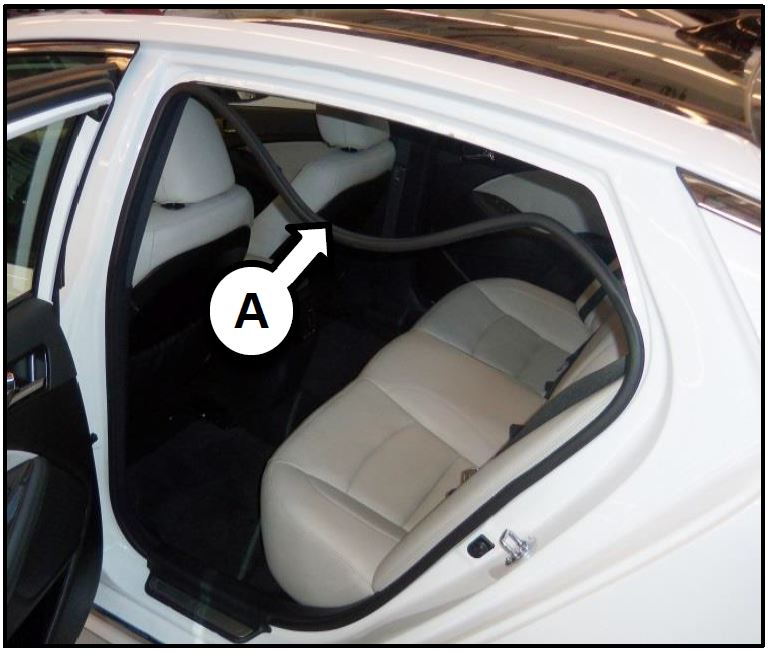
- Remove the weather-stripping (A) from the front and rear doors.
*CAUTION
Wear disposable gloves to avoid damaging the headliner.
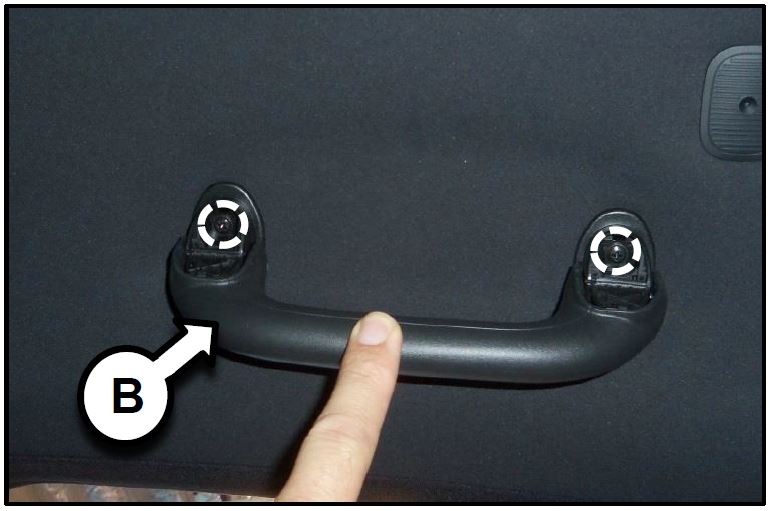
- Remove two screws securing the grab handles (B). Make sure to remove all four (4) grab handles.
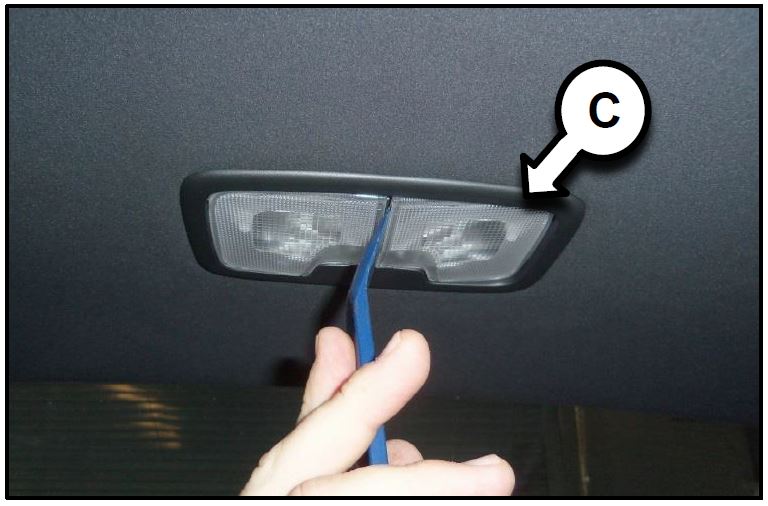
- 3Use a plastic prying tool to remove the lenses from the rear dome light (C). Remove two screws securing the rear dome light body and disconnect the electrical connector.
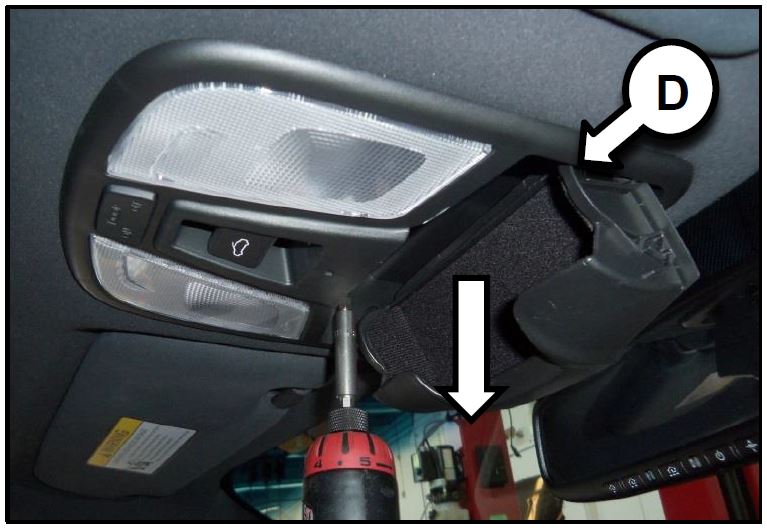
- Open the sunglass holder and remove two screws securing the front dome light (D). Gently pull down on the front of the dome light to release the mounting clips, disconnect the electrical connector and carefully remove the dome light from the headliner.
- Partially detach the A-pillar trim panel (E) using both hands. Then, use a pair of needle nose pliers to rotate and detach the mounting clip (F), as shown.
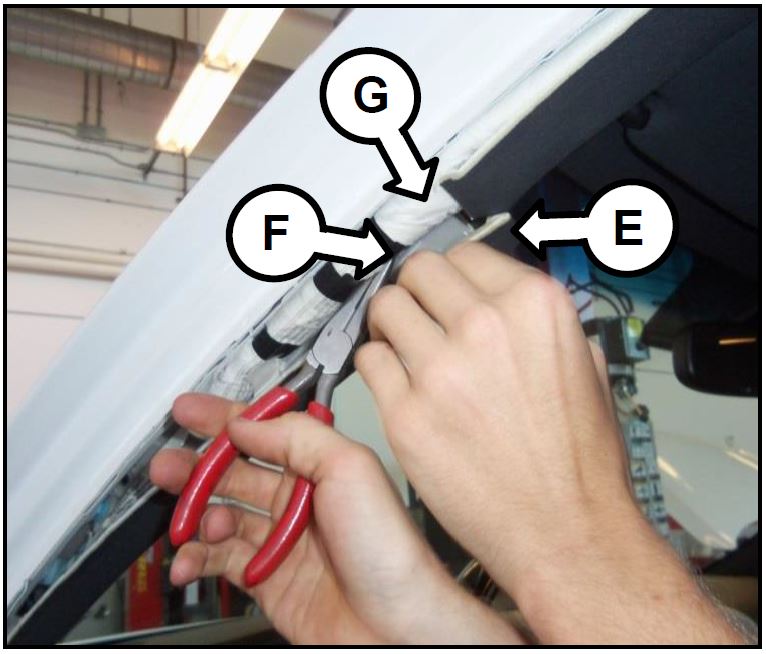
*CAUTION
Avoid damaging the side curtain airbag (G) while removing the Apillar trim panel.
- Use a panel remover (H) to gently detach the lower attachment point (I) for the A-pillar trim panel.
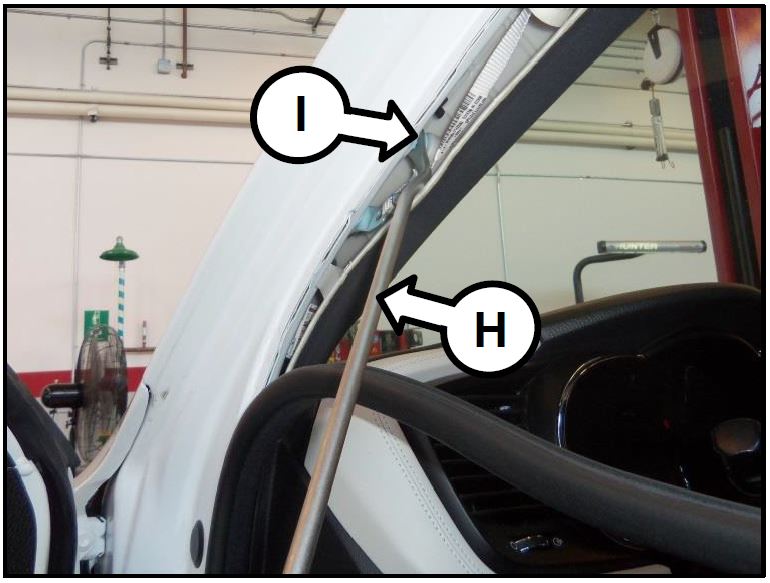
*NOTICE
Make sure to replace any broken clips before reinstalling the A-pillar trim panel.
P/N: 82315-33020
Description: Fastener-DR Trim
- Use a trim panel remover (J) with a long shaft to pry-off the upper attachment point (K) for the C-pillar trim panel (L), as shown.
- Continue using the panel remover (J) to gently detach all other mounting locations for the C-pillar trim panel (L).
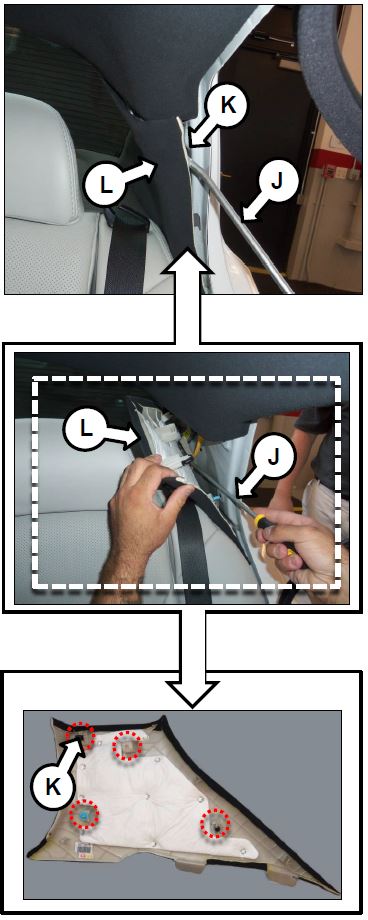
*NOTICE
Make sure to replace any broken clips before reinstalling the Cpillar trim panel.
P/N: 82315-33020
Description: Fastener-DR Trim
*NOTICE
Examine all mounting clip locations for the C-pillar panel.
- Move the front seat as far forward as possible and use a plastic prying tool to remove the front door threshold panel (M).
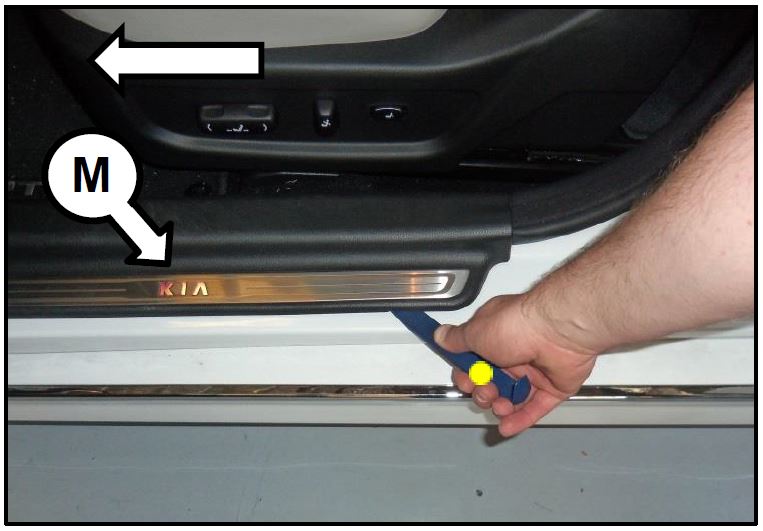
*NOTICE
Make sure to re -install any clips that may fall off the panel following removal.
- Use a plastic prying tool to remove the rear door threshold panel (N).
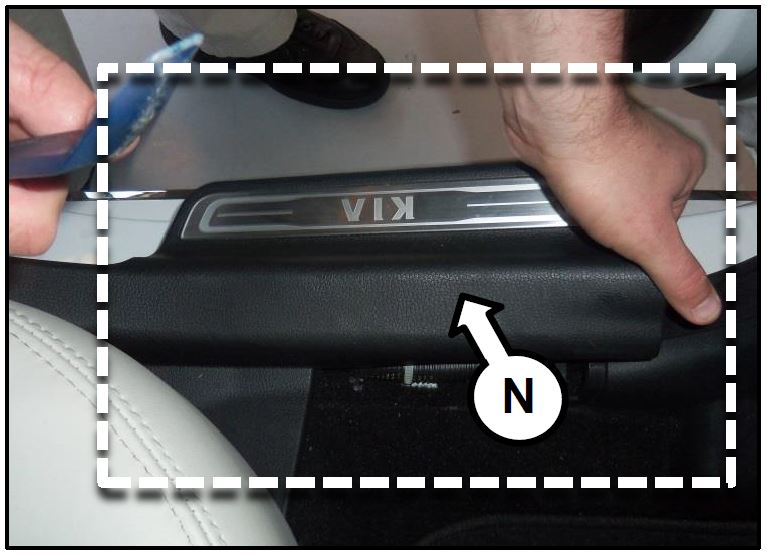
*NOTICE
Make sure to re -install any clips that may fall off the panel following removal.
- Lower the safety belt to its lowest setting and use a trim panel remover to detach all mounting locations for the upper (O) and lower (P) B-pillar trim panels.
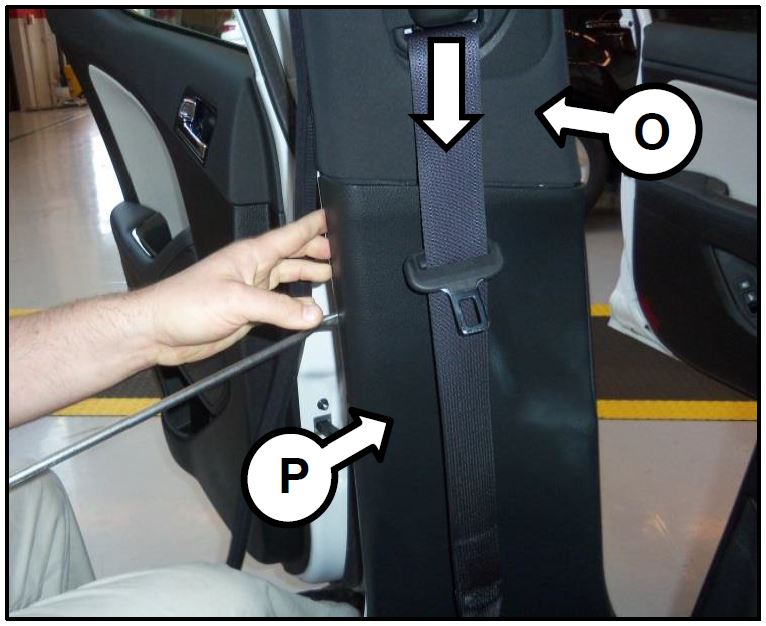
*NOTICE
Make sure to replace any broken clips before reinstalling the Bpillar trim panels.
P/N: 82315-33020
Description: Fastener-DR Trim
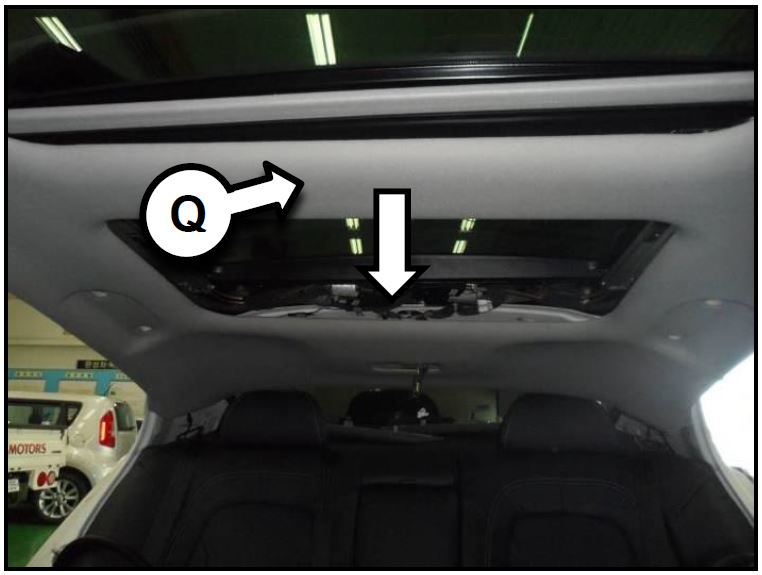
- Gently apply downward pressure to the headliner (Q) to create an access gap to the sunshade and the sunroof glass motors.
*NOTICE
Make sure to replace any broken clips before reinstalling the headliner.
P/N: 85849-1M000AS
Description: Clip-Trim MTG
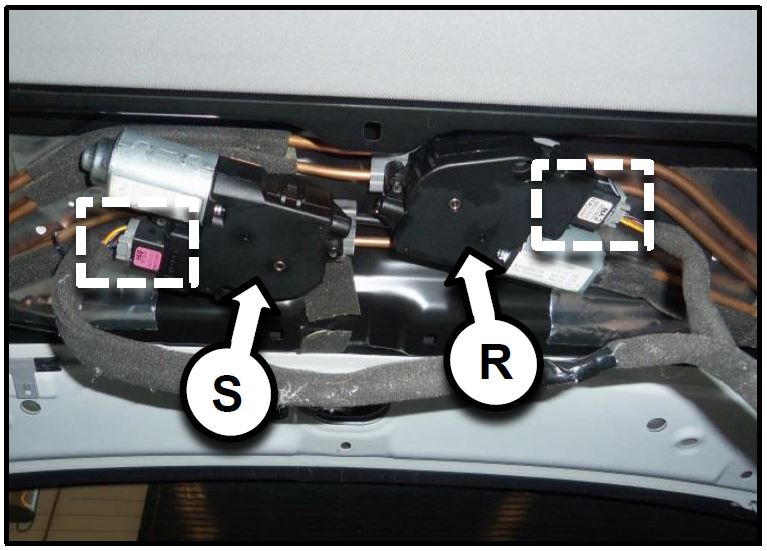
- Disconnect the power connectors from the sunshade (R) and sunroof (S) motors.
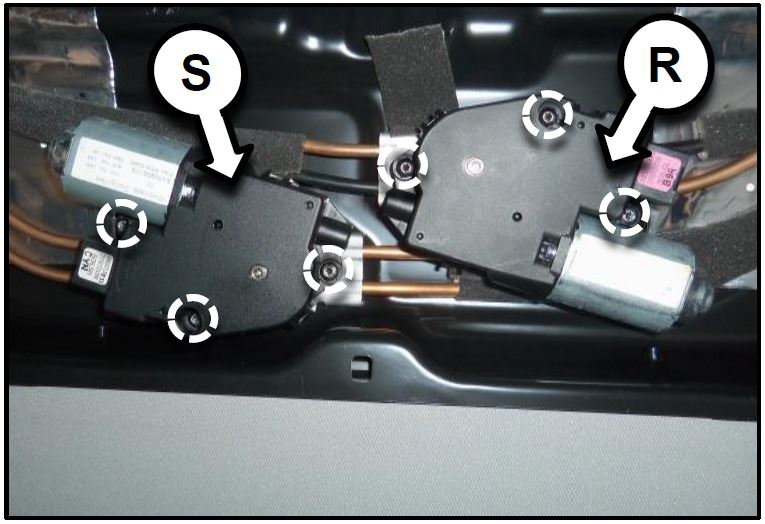
- Remove three T20 Torx head screws securing the sunshade motor (R) and three T20 Torx head screws securing the sunroof motor (S).
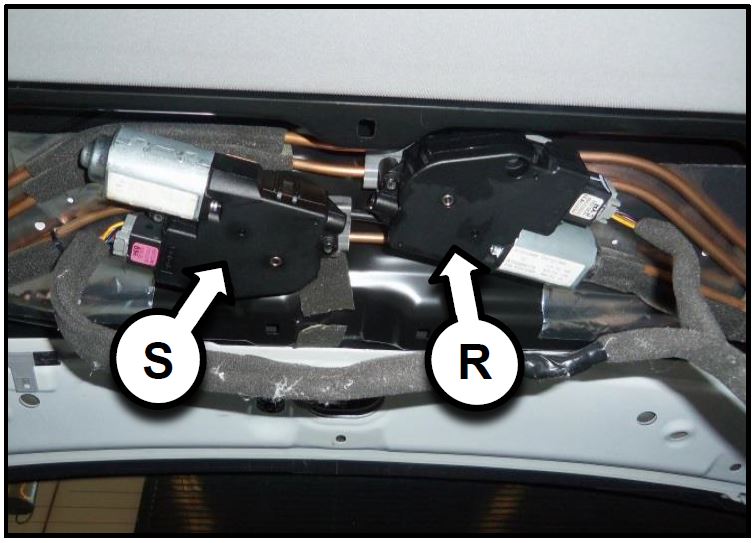
- Install the new sunshade motor (R) and sunroof motors (S) using the original T20 Torx head screws and reconnect the electrical connectors.
T20 Torx Screw Tightening Torque:
2.8 lb-ft (3.8 Nm)
- Install all other removed components by reversing the order of removal.
- Perform the panorama sunroof initialization procedure as follows:
- Turn the ignition switch to the ON position and close the sunroof completely.
- Release the control lever.
- Push and hold the control lever forward (for more than 10 seconds) until the sunroof tilts and slightly moves. Then, release the lever.
- Push the sunroof control lever forward in the direction of close until the sunroof operates as follows:
SUNSHADE OPEN → TILT OPEN →SLIDE OPEN → SLIDE CLOSE →SUNSHADE CLOSE → Then, release the control lever.
When this is complete, the sunroof system is reset.
REQUIRED PART:
| Part Name | Part No. | Qty. | Figure |
|---|---|---|---|
| Sunroof Motor | 81671-2T210 | 1 | 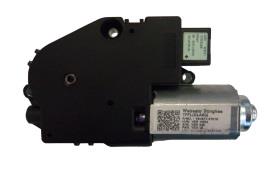 |
| Sunshade Motor | 81671-2T211 | 1 | 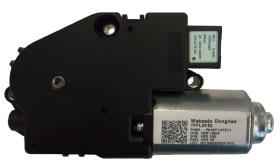 |
AFFECTED VEHICLE PRODUCTION RANGE:
| Model | Production Date Range |
|---|---|
| Optima (QF) | August 9, 2011 to August 14, 2013 |
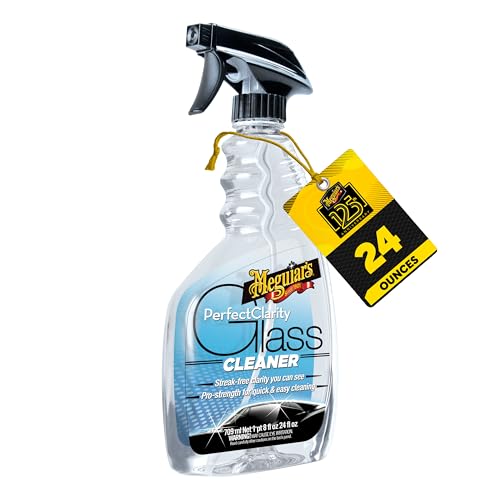
- PREMIUM AUTO GLASS CLEANER: Elevate your car glass cleaner routine with Meguiar's Perfect Clarity Glass Cleaner; The advanced formula is specially designed to deliver a streak and lint-free finish for crystal-clarity every time
- SUPERIOR RESULTS: Experience the difference with a specialized anti-hazing, ammonia-free automotive glass cleaner formula that spreads and wipes off quickly to outperform car wash soap and water as well as traditional household
- FOR CLEAR AND TINTED WINDOWS: Whether your glass is clear from the factory or customized with tint, Meguiar's Perfect Clarity Glass Cleaner is safe to use, offering sparkling glass no matter the shape, size, or style of your glass
- FINE-TUNED FOR GLASS: The high-performance cleaning formula effectively captures and removes tough dirt, fingerprints, smudges, and grime, leaving your glass surfaces flawlessly clean and streak-free inside and out
- SEE BETTER, DRIVE SMARTER: With the advanced clean and clarity offered by Meguiar's Perfect Clarity Glass Cleaner, you can confidently head out to that cruise, car show, or road trip knowing you can see everything the road sends your way
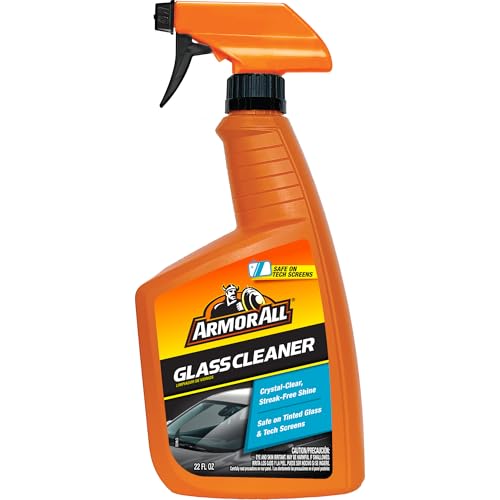
- This Item Armor All Auto Glass Cleaner 22 Oz.
- Used for Building Materials & Ladders, Flooring
- The Product is manufactured inUnited States

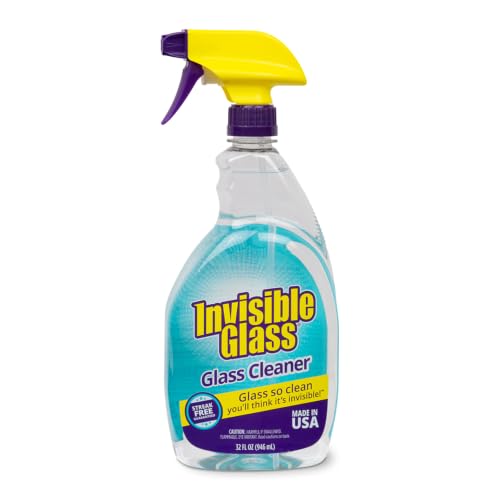
- INVISIBLE GLASS CLEANER: Invisible Glass Cleaner is the #1 top seller in automotive for window and glass cleaning at home and in the car. Get a brilliant, streak-free shine that's instantly noticeable.
- CONVENIENT SPRAY BOTTLE: Our convenient trigger spray bottle makes it easy to squeeze out every drop and get a brilliant shine at home, on stainless steel appliances, in the car, on the boat, or at the office.
- RESIDUE-FREE: Free from soaps, scents, and dyes, our proprietary blend ensures a brilliant shine without any streaky additives. Achieve spotless, streak-free glass with our 100% residue-free formula.
- AMMONIA-FREE: No high pH or hazy agents to spoil your crystal-clear shine—perfect for windshields, mirrors, and windows where clarity matters most. Safe to use on tinted windows.
- PROUDLY MADE IN THE USA: Invisible Glass is formulated, manufactured, and distributed in the USA. We use superior ingredients to deliver unmatched performance and reliability you can trust. We're committed to your satisfaction—If anything doesn't meet your expectations, contact us, and we'll make it right!
This product presentation was made with AAWP plugin.