| “This site contains affiliate links for which OEMDTC may be compensated” |
SUBJECT:
RATTLING, SQUEAKING OR CREAKING NOISES FROM ROOF AREA
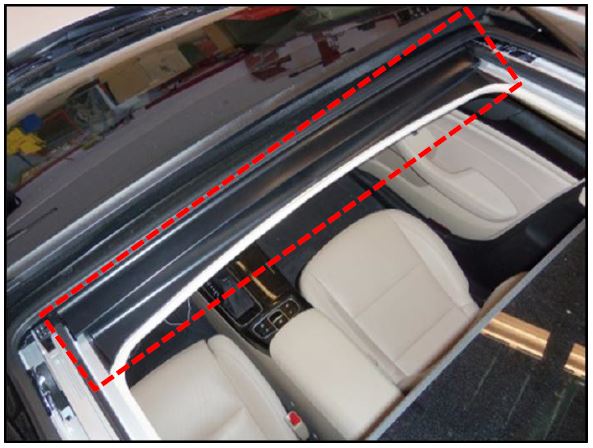
When addressing a rattling, squeaking and/or creaking noise concern coming from the Panorama Sunroof area, refer to the Service Procedures described below to resolve the concern. NOTE: Either Procedure 1 and/or Procedure 2 can be performed depending on the repair needed.
- If the rattle or squeak concern is heard at the front of the Panorama Sunroof, see Service Procedure 1.
- If the rattle or squeak concern is heard in the center section of the Panorama Sunroof, see Service Procedure 2 on Page 4.
Service Procedure 1:
Apply felt tape (Tesa 51606 is recommended) to isolate all touch points between the front cover assembly (step 1) and the body to resolve the noise concern. NOTE: to ensure proper felt tape adhesion, make sure to allow the exterior of the vehicle to cool down to room temperature prior to applying the tape.
- Open the Panorama Sunroof and remove the front cover assembly. Make sure to re-install any missing retaining clips back in place on the front cover assembly.
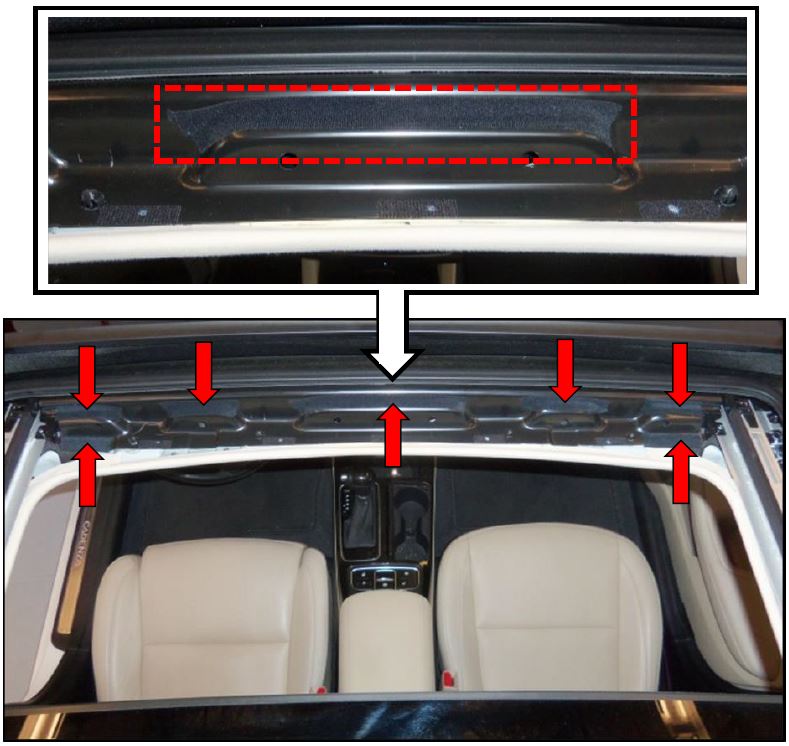
- Add seven (7) pieces of felt tape along the front of the panoramic sunroof opening in order to isolate the front cover assembly from the body and prevent possible squeaks or rattles.
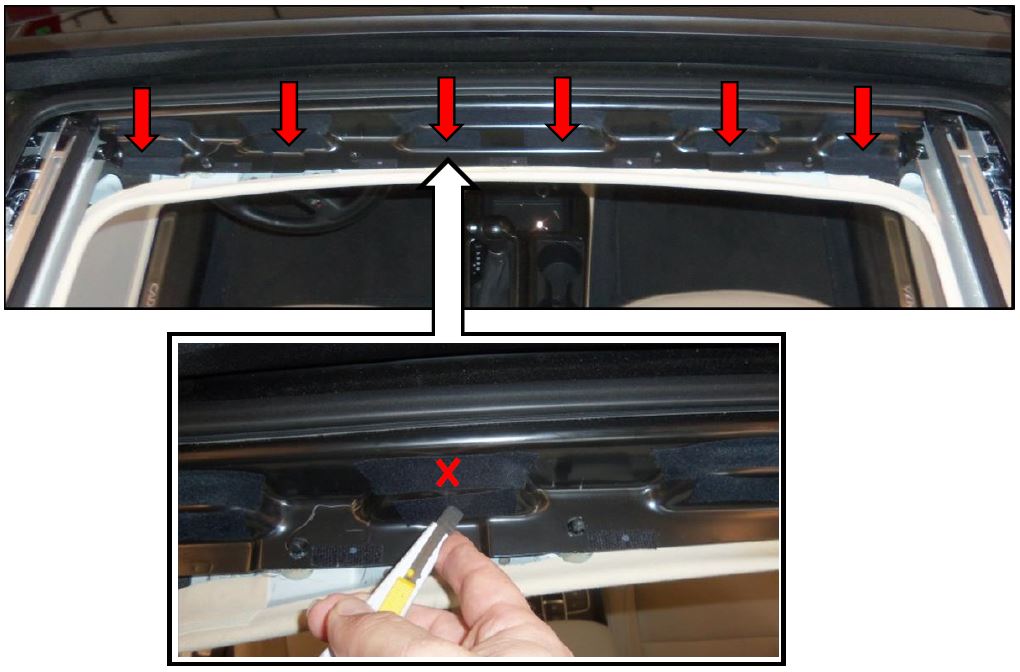
- Apply six (6) pieces of felt tape over the mounting holes for the front cover assembly. Cut the felt in an “X” pattern at each mounting hole to allow for easy insertion of fasteners.
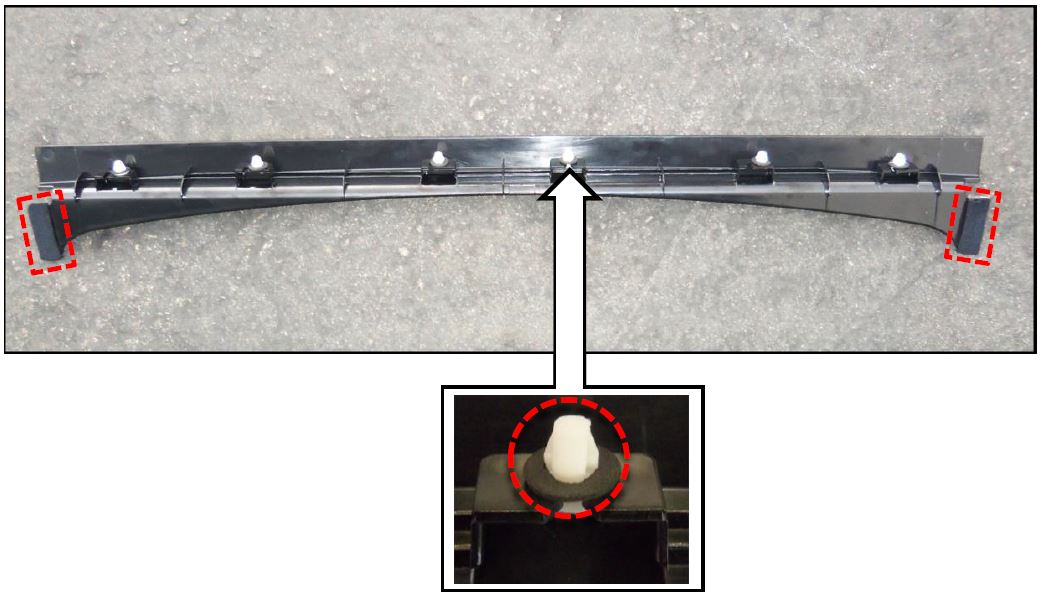
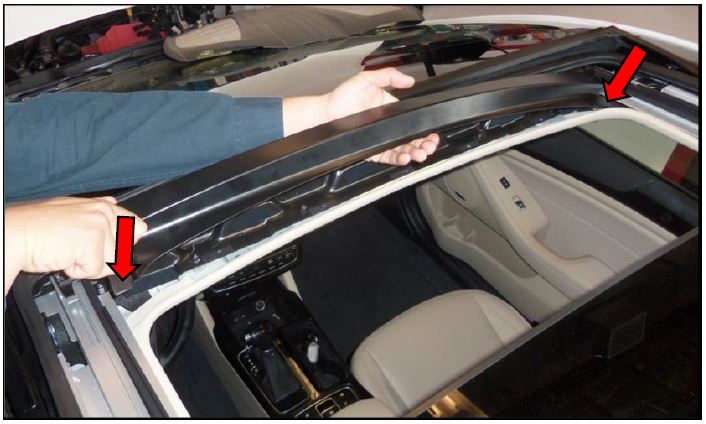
- Apply two (2) pieces of felt tape to the ends of the front cover panel, as shown. Also, make sure to remove the felt discs from the front cover assembly retaining clips.
- Check to make sure all retaining clips are properly installed on the back of the front cover assembly.
- Re-install the front cover assembly by engaging one end under the sunroof rail and slightly bending it until the other end can be inserted into the opposite side.
- Press each of the front cover assembly retaining clips into the mounting holes.
- Test-drive the vehicle to confirm the repair.
Service Procedure 2:
Check for possible loose Torx head screws in the Panorama Sunroof mounting rails and crossbar. If any bolts are found to be loose, make sure to re-tighten them to specifications.
- Drop the headliner by referring to the Service Information in KGIS under “roof trim” replacement. NOTE: Complete removal of the headliner from the vehicle is NOT necessary to perform this procedure.
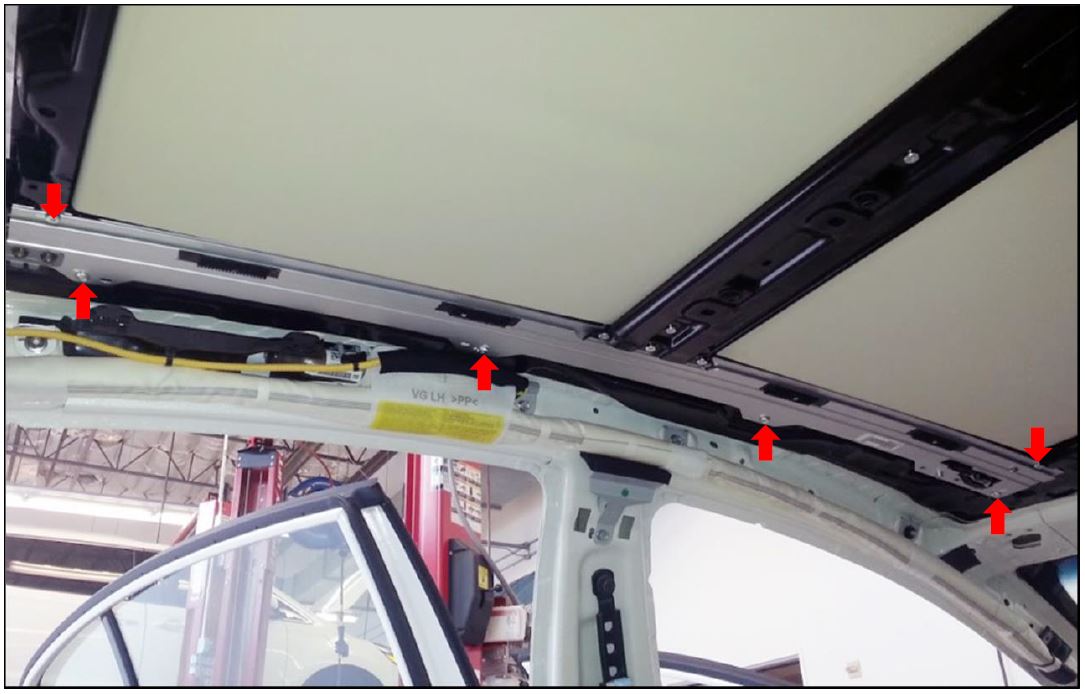
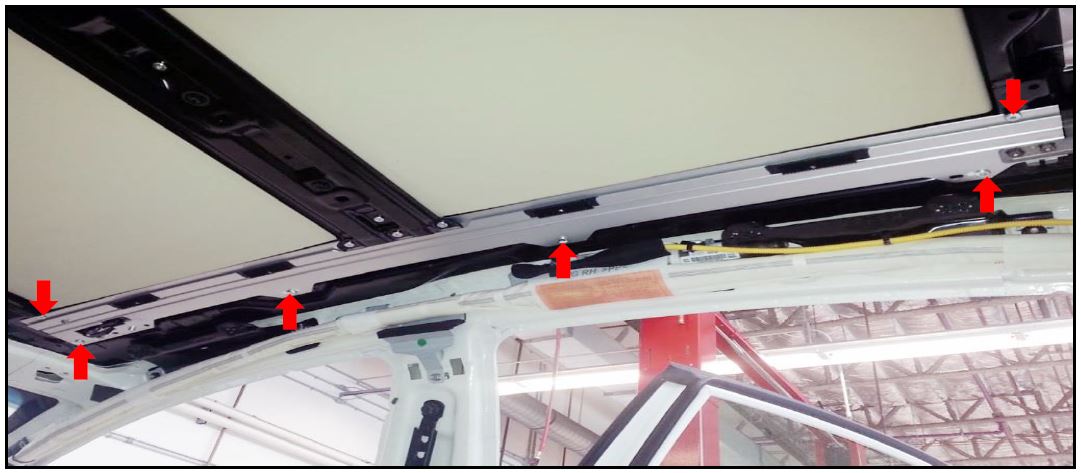
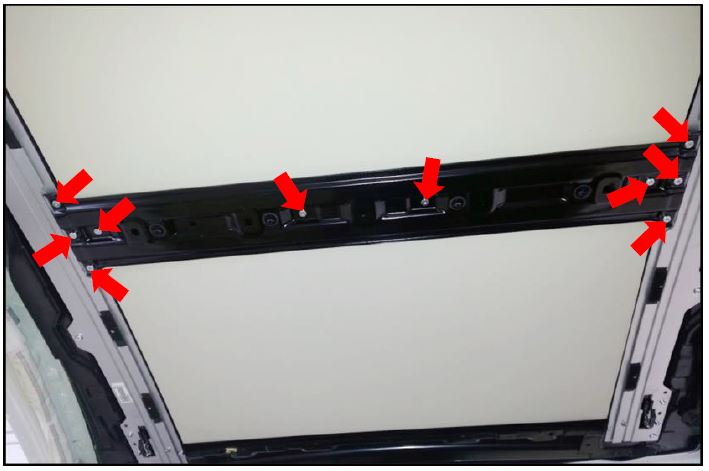
- Fully recline the two front seatbacks to provide more room for the headliner to be lowered and for easier access to the twenty-two (22) Torx head screws. NOTE: Be very careful when handling the headliner, as it is very susceptible to creasing.
- Use an inch-pound torque wrench to properly torque all of the Torx head screws, as shown below, on the left, right rails and center cross bar of Panorama Sunroof.
Torque specification for the Torx head screws: 53 in-lbs (4.4 ft-lb, 5.96 Nm) Note: do NOT over-tighten the screws.
Note: Prior to performing the repair, place an order for the part number(s) shown below, as these clips can be easily damaged or broken during removal of headliner:
P/N 85849-2E000 or 85849-3J000 (Black) or
P/N 85492-4D000 (White)
Left and right side rails:
Center Crossbar:
- Re-install all removed components by reversing the order of removal.
- Test-drive the vehicle to confirm the repair.
 Loading...
